Tuesday, November 5, 2024

10 out of 10 or 20/20 Vision??? You decide!

January 2023 saw the commencement of the 10 out of 10 project.  The premise was simple.  Myself and 10 different photographers shot 10 different subjects in my studio with a two hour limit and two outfits.   Some photographers I had worked with before, others not.  Some subjects I had worked with before.... others not. The ultimate aim was to create a body of work of exhibition quality that illustrates how two creatives and one subject can create vastly different works in the same space and time.  A juxtaposition of our skills and vision.

All went along well, shooting one subject a month until number 9.   Whilst in negotiations with my chosen number 9, he suddenly died. Unexpectedly.  Yes, he was an older man, but this was totally unexpected and a tragic loss.  He was known to me as a friend and photographer. The project stalled.  I wasn't ready to find a new number 9, but didn't want to let down the 8 fellow photographers and  subjects already committed to the project.  After some months I realised my replacement number 9 lived very close by. A rough and tumble fellow with a great look and being local should not have been too hard to organise.  

I was wrong.  He was always keen to shoot, but timing was an issue.  He couldn't do this day, or that.  He needed a haircut, but couldn't get happening and some weeks down the track it became obvious that he was terminally ill and ..... he too died before the shoot could take place.  

Mortified I felt the universe had spoken and this was not to be.  More months elapsed, but I approached no-one to participate.  Then one night I was out to dinner with my mate Joshy when I spied a fellow at the Yacht club.  Ballsy as ever, I forced my business card into his hand and asked him to look at my website and consider being part of the 10 out of 10 project.   Well wasn't I surprised when just 2 days later he rang me!! I was elated!  

With number 9 now "in the can" my aim was to finish off the project. Number 10 came to fruition after a luncheon at a different club (yes, I know, it sounds like all I do is eat and shoot). Number 10 was sat beside me at lunch and number 10 photographer was at the other end of the same table.  It just seemed so natural and I asked if she would be number 10.  As they say, the rest is history!


The project is finished. 


Or is it?


Should I continue?  


Here are some of my images of the original 10. 

What do you think? Should it become 20/20 Vision?


Studio reno

 The studio out the back of mine was once a granny flat, but ohhhhh how times have changed!  


In the recent bathroom renos, the bathroom in the studio also received a mini makeover with new toilet, vanity and tap sets including a sexy new rainwater shower head!   This offers the subjects and sitters and nice clean bathroom and a place to wash off body paint, oil and tinsel used in some of the more creative shoots.  In the once bedroom, now changeroom, I removed the 3 sliding wardrobe doors on the built in robe to open the whole hanging space to make outfit selection a bit easier. I also added a shelf above the hanging rack for props such as umbrellas and angel wings.  To one side I added translucent storage boxes for non hanging garments, boudoir accessories, swathes of fabric and props too big for the storage system in the Ikea Expedit system on the opposite wall.   

The biggest change though was the installation of a ceiling mounted backdrop system that holds 4 rolls of paper or fabric that are raised and lowered by a chain pulley system.   After much research I chose the Lighter 4 Hook Expansion system from Dragon Image in Sydney.   I specifically wanted a system that came complete with the aluminium inner tubes for holding both paper and fabric.  Without the inner tubing the paper rolls sag when humidity and age cause the paper role cardboard core to soften. This causes damage the paper roll with creasing.   I had it all delivered to the studio with an 11 metre roll of  Savage "Thunder Grey" paper and I must say the ordering, payment and delivery was super smooth.  One option was to swap out the plastic pulley chain with a metal version.  I ummed and ahhhed over that choice.  The metal chains added and extra $340 to the outlay of $550, plus delivery and I couldn't see what advantage they gave.  I have not been disappointed with the plastic chains and have no regrets in my decision.

I'm pretty handy with a drill, but I also am aware of my limitations and affixing the hooks to the ceiling was not a job I felt equipped to attempt so I outsourced that part to my local chippy who was very diligent win affixing the hooks into the ceiling joints.  He did a great job, fast and efficient and the tubes did need to be trimmed down slightly to ensure the hooks were in the best place for a secure hang.   The cost was minimal, I think it was $100 as a Saturday morning cashie.  Loading the paper rolls onto the aluminium tubes was an easy task.  Taping the fabric backdrops to the tubes was not fun, but with the aid of Moo we got it done.   It's not perfect and still need a little tweaking.   I do like a mix of fabric and paper, but for expedient hanging the paper wins every time!  Thunder grey can become pretty much any colour you like with a well placed strobe and gel.  

One thing that did change when I moved from a tripod based system to the ceiling mount was the orientation of the studio.  It was east/west, but the mount made a north/south hang easier and so I now have a shooting areas just over 5metres long and up to 3 metres wide.   This is wider than I could shoot before so a real advantage for groups.

As a part of the reno I bought new lights and modifiers too, sticking with the brilliant Elinchrom brand, but more on that in another post.  As part of the reno I needed a better system for storing the modifiers than leaving them folded up in a cupboard.   That can seriously ruin the flow of a shoot when you have to stop and break down one modifier and build another.  I deal with that simply by hanging them on the walls. Initially I wanted to create wall mounted hooks on a 3d printer in the Elinchrom pattern, but it was easier to use a mix of adhesive and screwed hooks.  I tried the Commander system first and it holds 80% of my modifiers, but the heavier soft boxes and beauty dishes were just too heavy and after a couple failed I moved to a wallmate screw system.  Works a treat and all the modifiers are ready to use in an instant.  

Absolutely love the new set up and have been shooting a lot more than pre renovation.  So when offered a second set of ceiling mount backdrop hangers second hand I grabbed them.   Having seen how the first lot went up I, with the assistance of Mr Next Door, mounted the second set.  They did not come with aluminium centre poles, so I hit Bunnings and bought 50mm poly pipe.   Using my trusty Ryobi tools I cut them to size and they now house 2m backdrops where I can use both natural and ancillary lights.


Monday, May 29, 2023

Bathroom reno

My home, whilst cosy and comfortable, has a couple of bathrooms and a kitchen from the dark ages!

I kid you not!  70's style, with poor quality and poorly executed 80's updates reigned supreme.  I've never been overly keen to change that status quo, but I think the indoctrination of daytime telly had manifested change in my mind.  Not only could these rooms be beautiful, but I could do a lot of the work myself!

So the work has begun.   Each bathroom has a new vanity and loo and EVERY tap and spout in the entire house has been replaced.  Yes, I do mean outdoor taps and laundry taps and even a new tap down the back for the veggie patch. Every air vent, IXL tactic, light switch and power point has been replaced and in the main bathroom the vanity lighting has also been replaced.

It is still very much a work in progress.  Mirrors and towel rails now hung and it all need a good clean..... but it is an amazing improvement at very little expenditure.

I was struggling to get the right dunnies to suit as the "set out" was probably not standard, or maybe old standard is a better term.  I tried a locally well known plumbing supply business who simply dicked me around for 90 minutes.  They didn't know their stock and was walking to loo to loo in the display room with a tape measure checking the set outs!!!

Fortunately a rather frustrated call to the most amazing plumber Errol, from Errol Hancock Gas and Plumbing put me in contact with Tara at Reece plumbing, Gateshead.   In a 10 minute phone call with Tara, in which I thought I totally bamboozled her, she sorted all my plumbing supplies.  About 45 minutes  later I had a written quote emailed to me from the most amazing Tara and... it was spot on!!!!  The dunnies were the right sizes and perfectly suited to the rooms.  The tap sets were just magnificent.  Tara is a total genius ... and obviously understood the ravings of a plumbing supply virgin.  I should clarify the call to Tara was made from my car as I was diving to an appointment.   I didn't have exact measurements.  I was recalling from memory, describing tap shapes and finishes and she got it absolutely right!


So here are some "before" and "work still in progress" photos.  There is still much to do, but crikey between Tara and Errol I am well on the way to a classy new loo or two!  And the kitchen.... well that's next!   


Sunday, October 9, 2022

Roof Restoration!


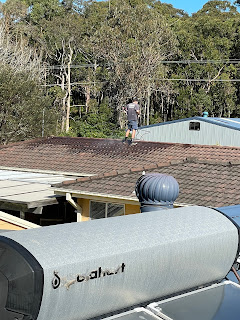
So in the vein of Reno madness I decided to replace the concrete tile roof.  There was nothing wrong with it, it covered perfectly well, didn't leak and performed all the functions a tile roof should.....but it was that ordinary glazed brown colour and .... well I just didn't like it.  It was perfectly sound, but ... well I guess bland is the best description.  On the jobs list is to repaint the house and I just couldn't find a colour that went with the tiles.   

I decided that  a colorbond iron roof was a better bet.  Or so I thought until I got a quote to replace the tiles. There was no way I could justify removing a perfectly functional roof and replace with colorond for what seemed a stupid amount, $35,000.  The quote did include removal of the tiles from the site and eco friendly disposal, but it was still a lot of cash to splash.   Yes, it IS a big roof, but I couldn't justify that outlay.  I expect to be under this roof for another 25 years or so and the tile will go the distance.  The most viable and "bang for your buck" solution was to have it painted.  When I say painted I mean scrubbed, sealed AND painted.

So the research began on all things painted.  Colorbond also do a line of paint colours and from that I chose the deepest grey.  A colour called monument. Research began,  shoutout to a restorer and the work commenced.   Like any painting job the hard work is the preparation.  Two days of scrubbing and repointing was swiftly followed with a day of sealing.  In the process it was found that there were 6 cracked tiles on the roof.   They were replaced and a further 10 were painted to match the new colour in case there needs to be a repair further down the line.  


The actual colour spray only took about 2 hours per coat and she took 3 coats to look smick.

Not content to stop there the wonderful spray people also hand painted the gutters!! The many miles of gutters! And the fascia on the garage AND the carport!  

The work was done by UPCOLOURS Roof Restoration.  Awesome folk, highly recommended. So if you are in the Hunter region of NSW then give them a call.  Next job.... pick a paint colour to go with Monument!  Any ideas???


Thursday, May 19, 2022

Look who's doing a podcast!

Way back before COVID really kicked in my mate Moo, aka Miss Krissi Marie,  and I thought we might like to create a podcast.  Yeah, like why the hell not!   We crack ourselves up everytime we get together... so why not share that joy with all and sundry??!!?

The research began ..... exactly how one does create a podcast?   That, in itself, was an interesting learning curve.  We needed equipment, a space in which to record, software to record and edit on, web hosting, intro music, artwork and a list of subject to discuss.  Surely that wasn't too hard to sort!   A good friend Nate gifted us some equipment and basic info on how to use it,  I had a library that, with little alteration, became a suitable space in which to record, Moo researched and sourced appropriate software and taught herself to edit.  She also researched web hosting.  Nate, being an amazing musician accepted a commission from us for intro music and together we brainstormed a huge list of potential subjects.

So what was so hard???  Well two things really caught us offguard with their degree of difficulty!  A name for our chatfest and some sound editing issues that truely were beyond us, grew into major issues!

After a few days of back and forthing we created a short list of podcast names.  Much discussion followed and one name fitted our criteria, thus "Delusions of Grandeur Podcast" was born!  And so it began... we recorded our first podcast and thought we were awesome.... only to find sound production was ... lacklustre at best!  Dreadful would be a more apt description!!    Moo, known for her researching and problem solving skills tried EVERYTHING to get us sounding good.... all to no avail.   Fortunately thru my photography practice I had met and photographed a sound engineer known as "Mr Meat".  A gentle giant of a man with tremendous skill in his chosen field.   I organised a meet with Moo and Mr Meat and within a relatively short time frame he diagnosed our production issues and pointed Moo in the right direction.  Two pieces of equipment were purchased and suddenly we sounded great!!

With all the production issues under control Delusions of Grandeur has become a part of our weekly lives.  We record one night a week, Moo edits and we go live on all the regular places each Wednesday morning. 

So if you have about 30 minutes free each week and want to listen to us search on all the regular sites for the Delusion of Grandeur podcast or look us up on Insta or Facebook.  

Hopefully I'll put the right link here and not the one to our only fans site!!!   (joking, apparently we aren't on only fans... dunno why!!!).

Delusions of Grandeur

Sunday, April 3, 2022

Covid Craziness V1.0

Fair to say all of us endured many days and weeks in lockdown, myself included.  To say we all handled it differently would be the understatement of the year!  For me.... I'm classed as an essential worker, so I still headed to the office 9 days a fortnight. I live alone, so work provides me with social interaction that would be sadly lacking if I was working from home, or worse still, out of work.  So not a lot changed for me, other than work is busier than normal, and the cessation of social interaction outside of work.  From time to time I endured weekend lockdowns and it was the housebound part that has created some covid craziness!!  So many projects previous just passing thoughts were enacted, created and now, blogged about!

One such project was to create a terrarium!  I follow a gardener on Instagram and he makes some amazing terrariums, so I dug out some glassware and acquired some plants and.... well....  well I made 9, none of which I am perfectly happy with at this stage.  

Terrariums can be open or closed.  The glasswear I had was all lidded so closed terrariums it would be.

The concept is an old one.  In fact the oldest known surviving closed terrarium was created by a pommie called David Latimer.  He created one with a single cutting in 1960.  It remained sealed for 12 years  when, in 1972, it was opened and water was added.  It's still going now in 2022.  That is one old terrarium!!! I don't know if it has outlived David Latimer!

So my process was thus.... Into the washed bowl of the terrarium I layered black pebbles, horticultural charcoal, sphagnum moss, soaked and dripping and a final layer of succulent potting mix.  My plants were removed from their pots and popped into the succulent layer of medium.   By varying the depth of the medium hills and dales were easy to create so plants of similar height would appear different in the finished product.  

Wide mouth jars and bowls were the easiest to fill and plant out.  The hardest was a 5 litre old glass drink bottle. It was easy to funnel the growing medium in. Harder to create different levels and nearly impossible to get the plants well bedded into the succulent mix!  I used long handled tools and a couple of thin bamboo stakes, but it was not my best work.  I pulled 3 or 4 apart and remade them.  Too much succulent mix was a problem in the early attempts.  It is a case where less gives a better look. There is still plenty of room for root growth thru the layers.

Still unfilled are two 50 litre carboys.  Huge glass jars with very narrow necks.  Unfilled as I am not sure how to effectively create the hills and dales that make a good terrarium.  I will work it out and I will create the last two terrariums, but that, I feel, are enough.   Its not like outdoor gardening because if they are done correctly then need no future care....... well not for the first 12 years anyway!!!


Thursday, July 15, 2021

I've gone Elinchrom!

HAHAHAHAHA... just found this had been sitting in "Drafts" for ohhhh about 11 months!  I'm a silly billy!!!

For those of you who have read along before, welcome back.  For those who are new allow me get you up to speed, pronto.

I love photography, it is my only real creative outlet.   I also have a home studio and a love of controlled light photography, Off Camera Flash or OCF to the newly initiated.  This all started with a photo of some dead flowers against a black backdrop taken with a single Canon Speedlight..... off camera.   I've always been a canon user and on this occasions I triggered the single Canon 580exii flash with a Canon St-E2 trigger on a coffee table in my loungeroom.  The backdrop was a roll of black gift wrap paper.  I was gobsmacked at the result.   Loved it,  and an addiction had began!

Fast forward 12 months and I had garnered together a vast array of Canon gear.   4 x 580exii flash heads and 2 x 430exii's as well.  I'd moved from the St-e2 to Pocket Wizards, so I have 6 x tt5's with a tt1unit and an Ac3 controller.   The madness of gear acquisition continued.  A Sekonic light meter with the pocket wizard module replaced the Sekonic light meter without the pocket wizard module!    Backdrop stands, light stands, cold shoes, bungees, clamps and.... the Modifiers!   I bought some Godox softboxes. Big gridded umbrella octos and some rectangles with grids.  I couldn't get a strip soft box for my system, but I made up 4 strips that I clamped on the sides of the rectangle soft boxes to make a strip light that I could adjust simply by moving two bull clips.   I even bought a cheap shitty boom arm and it was ..........really cheap and shitty!

I've totally impressed myself with the quality of light I have been able to capture with this set up...... but then one Saturday afternoon a text from Josh changed everything.  For YEARS I had wanted, no coveted, even lusted after Elinchroms.   Josh, to his credit, consistently reminded me to not spend any more money until my gear couldn't do what I wanted it to do, but my gear had never left me wanting.  Still I had a crushing desire to own an Elinchrom kit.   I'd only ever used them a few times.... mostly I had been Joshy's VAL (voice activated light stand) on a number of his shoots.   He used a ranger system,  battery operated heads as bright as the sun!!!    In fact he had left his gear in my studio some months before when his work took too much of his time and shooting became something he no longer had time for.   But I digress.  Josh texted me with a link to a bloke selling off some older elinchroms SUPER cheap.  SO cheap I had suspicions about its provenance.  I made contact and my fears were instantly allayed.  This dude knew his stuff.  He spoke confidently about the gear and what he believed was a fault, but for the price I was IN!   I contemplated a late night drive to the Central Coast to meet up, but decided a Sunday morning leisurely cruise would be a better bet and in the morning I was glad of that decision. The windy road to his place was bad enough in daylight.  It would have been horrendous at night!

So I scored a three head system with two softboxes and a reflector, a skyport controller, lightstands,  spare bulbs and a manual for bugger all dollars.  Josh was concerned that I had bought a lemon, but all heads work and the modifiers were in perfect condition.   The huge octos from his ranger system all fitted the system I purchased, which is the beauty of the Elinchrom system and... the big win...was that Josh HAD a strip softbox!  Albeit, without grid.

So the fun continues with 240V lights instead of battery powered speed lights.   I'm not savvy enough to see the difference, if in fact there is any!   I do enjoy the set up. It is super speedy and the variety of softboxes, brolly and reflections I have is stunning.

Its one and only downside is that it is not portable, as in outdoors.   But I retained some speed lights and Pocketwizards in case I ever needed to take it outside.  

Sooooo wanna see some Elinchrom lit images?  I was hoping you would say yes!